Outbound Guide: How to Fix the Windmill and Restore Power
Master the Rotating Room Puzzle and Claim the Mortar and Pestle Blueprint
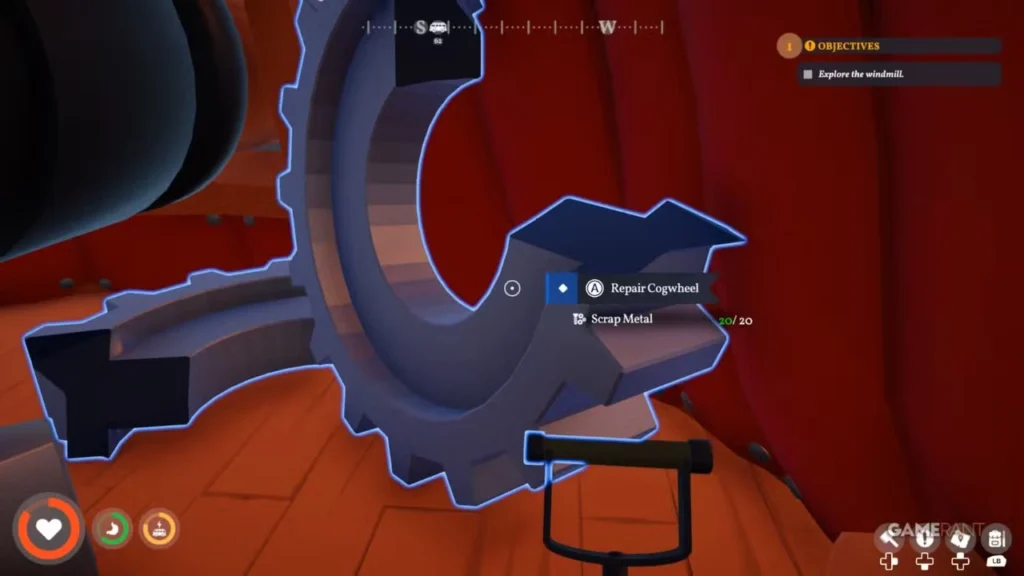
Quick Answer: To fix the Windmill, pull the left lever on the ground floor twice to rotate the room above. Climb up, use the ramped barrels to hit the hidden switch, and brave the glitchy ladder to reach the roof. Repair the cogwheel using 20 Scrap Metal, pull the brake lever, and head back down to claim your Mortar and Pestle blueprint!
Most of the landmarks scattered across Outbound are a walk in the park. You show up, hack a terminal, and leave with shiny new schematics. The Windmill totally breaks that trend. When you arrive, the power is completely dead, and the main terminal room is locked tight.
Getting that door open means restoring the power. To pull that off, you have to navigate a rotating room puzzle, climb to the very top of the structure, and repair the heavy machinery yourself. Here is exactly how to get the blades spinning again.
Solving the Rotating Floor Puzzle
Your first obstacle is right inside the front door. Head up the short flight of stairs to find a control panel featuring two distinct levers. These levers actually rotate the entire ceiling above you clockwise and counterclockwise.
If you climb the first ladder right now, you will notice a second ladder dangling entirely out of reach. You will also see some shelves and a few barrels with a plank balanced on top. You need to rearrange this room from below.
Follow these exact steps to solve the puzzle:
- Walk up to the main control panel with the dual levers.
- Interact with the lever on the left side exactly twice.
- Climb the ladder back up to the second floor.
- The room will have rotated, moving the barrels against the wall and exposing a hidden switch where the shelves used to be.
- Walk up the wooden plank on the barrels and flip that switch to drop the final ladder.
Conquering the Glitchy Ladder
You should now have a clear path to the roof, but this specific ladder is notoriously buggy. Walking straight into it often does nothing.
To bypass this frustrating glitch, you need to either repeatedly jump at the base of the second ladder until your character grabs the rungs, or drop down to the ground floor and climb both ladders in one seamless motion without stopping. Once you reach the top, make sure you physically jump onto the roof platform. Simply walking off the top of the ladder can send you plummeting all the way back down, taking a massive chunk of fall damage in the process.
If you are tired of climbing dangerous, abandoned windmills and would rather just chill out in a massive, multi-story RV, check out our upper deck building guide to learn how to add a second floor to your mobile base!
Making the Roof Repairs
Once you safely reach the top of the Windmill, you will spot a Pull Brake Lever. Give it a yank, and the game will tell you it is broken and advise you to check the cogwheels.
Walk directly behind the brake lever to find the source of the problem. You need a hefty stack of materials to get things moving again.
Here is exactly what you need to do before leaving the roof:
| Task | Requirements | Specific Location |
| Fix the Cogwheel | 20 Scrap Metal | Directly behind the Pull Brake Lever. |
| Loot the Disk | None | Resting on a crate to the right of the ladder. |
If you showed up empty-handed, you are going to have to climb all the way back down and start farming Signal Towers to gather enough Scrap Metal. Do not forget to grab the terminal executable disk off that crate! You absolutely need it for the final step.
Claiming Your Blueprint Reward
With the cogwheel patched up and 20 Scrap Metal lighter, interact with the Pull Brake Lever one last time. The Windmill will instantly roar to life, and the blades will start spinning.
This action restores power to the entire facility and automatically unlocks the door on the ground floor. Climb back down, walk into the newly opened terminal room, and use the executable disk you grabbed from the roof to download the Mortar and Pestle blueprint.
If you want to master every aspect of your campervan adventure, be sure to check out all of our other guides at Novus Vektra.