Mouse P.I. For Hire: Surviving Big Mouse, Little Hope
The complete walkthrough for the Big Mouse Little Hope chapter. Find every hidden comic, crack all three safes, and survive the opening chase.
The opening chapter of Mouse P.I. For Hire throws you right into the deep end. Jack Pepper is an ex cop trying to pay off his debts in Mouseburg, and things immediately go wrong. The game gives you almost zero hand holding outside of a few random posters. This guide will get you through the opening chase, crack all three safes, and find both hidden comics before that blimp gets away.
Kicking Off The Chase
You start in an elevator that dumps you into a room with doors everywhere. Most of them are locked. The game uses a bright white color to show you which doors actually open, so keep an eye out for that specific glow.
Head left through the Staff Only door. You will spot three tutorial posters teaching you the absolute basics:
- How to dash out of danger
- How to use the hint glass
- How to equip the Detective Brush
That brush is your best friend. If you ever get lost, spray some dust to reveal glowing footprints. Right now, those prints point south.
Follow them upstairs to a ladder. Read the jump and crouch posters, then take a massive leap down to the lower platform. You will take fall damage here, so immediately grab the Heal D drink from the white first aid cabinet at the bottom of the stairs.
Your First Fight and Safe
Go up the next stairs and open the door. Time for your first fight. A single enemy gives you a chance to test out your Micer pistol and your Mitts. Grab the ammo box, chug another Heal D, and take the elevator up.
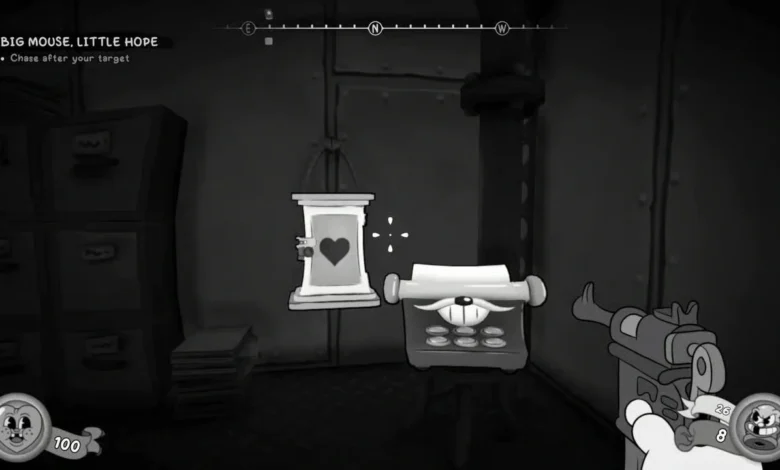
You will step out right in front of a typewriter. These are your manual save points. Use every single one you find.
This room also has your very first safe, which introduces the tailpicking mini game. You have to navigate your tail through a dark maze and pop up all the gumdrop bumpers to open the lock. Your tail cannot cross its own path. This first safe is purely practice. It has no timer and no spikes.
Speaking of mini games, if you want the absolute best weapon later on, you actually need to play the Baseball Cards game. Do not skip it.
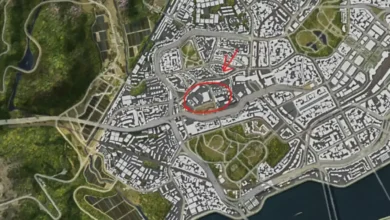
The Customer Service Puzzle and Comic 1
Head left into a massive room with a customer service desk in the middle. Three enemies will rush you. Kick the lighter colored boxes and barrels to grab loot without wasting your bullets.
Look for a white cable running from the big double doors to the service center. Tailpick the lock on the south side of the desk and flip the switch inside. Power will flow through the cable and unlock the doors. Before you walk out, kick the glass out of the opposite window and crouch through to steal the items inside.
Head through the double doors. You will spot your target before he runs away and drops six waves of goons on your head.
| Wave | Enemies to Kill | What They Carry |
| Wave 1 | Two Goons | Two Baseball Bats |
| Wave 2 | Two Goons | One Gun, One Bat |
| Wave 3 | Four Goons | Two Guns, Two Bats |
Use the staircases for cover. There are Heal D drinks on the east side of the ground floor and another inside a first aid cabinet slightly higher up. Ignore the slot machines. They are literally called Super Life Wasters and do absolutely nothing.
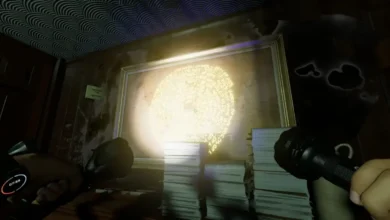
Once the room is clear, walk east past the bar. You will see some loot stuck behind a vent. Keep walking into the next room, take an immediate left, and go left again around the corner. You will find a cheese grated vent pulled away from the wall. Crawl inside, turn on your flashlight, and climb down the ladder to grab that loot from earlier. You just found Comic 1.
Comic 2 and the Weapon Schematic
Leave the vent, walk down the right staircase, and save at the typewriter. When you walk down the next set of stairs, your target bails on you again.
Follow the path, dodge the boxes, and shoot the guy in the next room. In the hallway, you will spot a timed safe with spike walls. You only have 28 moves to crack this one. Save your game first. If you succeed, you get a Schematic that you desperately need for weapon upgrades later.
Before you chase your target down the final stairs, run UP the stairs instead. You will find a fat stack of cash and Comic 2 sitting right at the top.
Now head all the way down. Clear the ambush, kick the barrels out of your way, and tailpick the locked door. You will find a dedicated safe room loaded with cash, health, ammo, and a typewriter. Loot everything.
Catching the Blimp
Walk through the east door to trigger a cutscene. Your target is standing on a blimp surrounded by floating metal platforms, talking trash to Jack.
The game throws three final waves at you. Each wave has two enemies, one with a bat and one with a gun. Smash the nearby barrels for health between rounds if you need it.
Once they are dead, walk across the bridge toward the blimp. The bridge snaps, Jack falls, and the opening credits roll. That is the end of the chapter. There is no secret way to avoid falling, so just let the cutscene play out.
If you want to skip the headache in other games too, check out the rest of my guides right here. Need more help surviving Mouseburg? Check out our The Ultimate Mouse P.I. Beginner’s Guide for a complete breakdown of weapons, missions, and farming routes.