Voidling Bound Guide: How to Master Breeding, Stats, and Mutant Variants
From Dual Natures to Cybernetic Mutants: The Ultimate Guide to the Pheromone Nest
Quick Answer: Breeding is the absolute core of endgame progression in Voidling Bound. Do not waste top-tier parents before buying Henry’s Hatchery upgrades, always secure your perfect Dual Natures and level 20 base stats before touching the Splicing Station, and expose your eggs to intense radiation during the final stretch of incubation to hatch exclusive mutant variants.
Why You Need to Start Breeding Early
Breeding in Voidling Bound is not just some optional mini-game you can ignore until the credits roll. It is the absolute engine driving your endgame power. Relying purely on standard leveling will leave you hitting a hard ceiling fast. If you want to push base stats to the absolute maximum, unlock game-breaking Dual Natures, or hunt down physical mutant variants, you must dive into the Pheromone Nest.
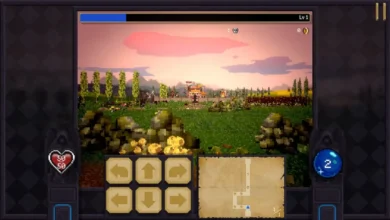
Once you clear the “Reclaim Sanctuary” mission, your ship unlocks the Breeding Station. You get up to three Pheromone Nests, which accept two parents of the exact same species. Forget about cross-breeding; the system strictly requires matching species.
Drop your parents into the nest, launch into a mission, and check back later. Eggs drop upon mission completion. Standing around the ship waiting achieves absolutely nothing. The exact genetic makeup of your new creature rolls the exact second you collect the egg.
Maximizing Your Base Attributes
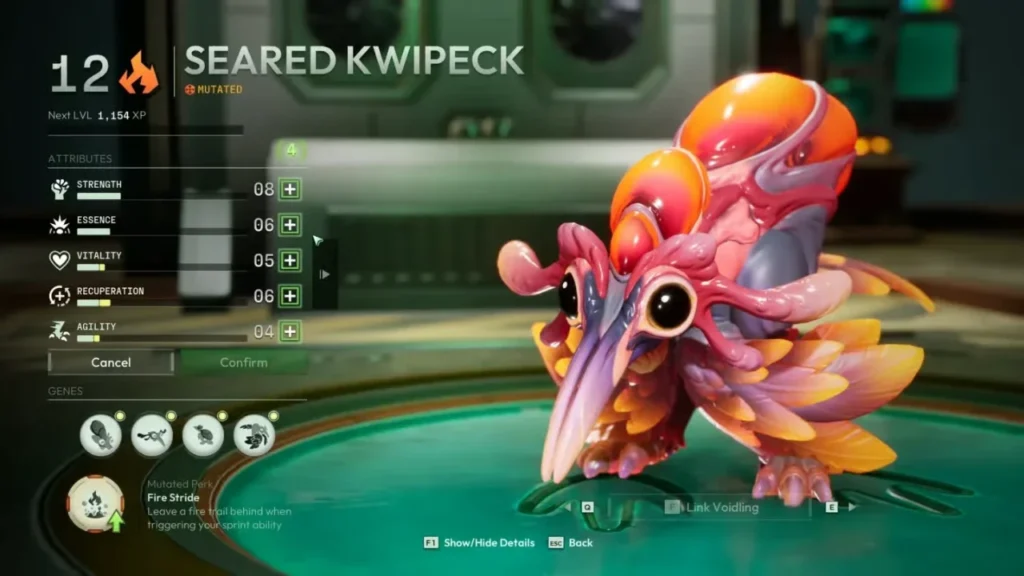
Every Voidling features five core stats. A flawless, maxed-out creature boasts a natural 20 in every single attribute before any Nature modifiers kick in. However, the game caps inherited stats at 80 out of a possible 100 points, leaving the remaining 20 for you to grind manually. If your parents are too stacked and push past that 80-point inheritance ceiling, the system randomly shaves off stats to keep things balanced.
Here is what you are actually breeding for:
| Core Attribute | Tactical Advantage | Best Build Synergy |
| Strength | Boosts raw attack power and critical hit damage | Hyper-aggressive damage loadouts |
| Essence | Multiplies elemental output and status effect severity | Dedicated Poison, Burn, Frostbite, Static, or Disintegrate setups |
| Vitality | Scales maximum health, physical armor, and stamina | Tanky bruisers and early-game survival |
| Recuperation | Slashes ability cooldowns, speeds up reloads, and buffs ultimate charge rates | Skill-spamming casters and slow-firing heavy hitters |
| Agility | Increases global movement speed, fire rate, and baseline critical chance | Evasive snipers and mobile run-and-gun builds |
By default, a newborn only inherits up to 50% of a parent’s stat values. If you slam two god-tier monsters together on day one, you are going to get an incredibly underwhelming baby. You need infrastructure upgrades before chasing perfection.
Inheriting Natures and Forging Dual Natures
Natures operate completely independently from base stats, meaning you have to juggle both simultaneously. If your two parents carry different Natures, the baby automatically inherits whichever trait has the lower rarity.
Mixing different Natures is the only way to strike gold and birth a creature with a Dual Nature, allowing it to benefit from two active modifiers at once. Again, the system defaults to the lowest rarity of the pair. Never throw away a weak duplicate if it happens to carry an incredibly rare Nature. That garbage-tier Voidling is actually the missing puzzle piece for a god-tier breeding chain down the line.
Essential Hatchery Upgrades to Target First
You purchase these upgrades from Henry using Research Samples. They are entirely gated behind your Wrangler Level, which goes up as you discover fresh genetic sequences out in the wild. Focus strictly on the upgrades that increase inheritance thresholds first.
| Hatchery Upgrade | Wrangler Level Required | Cost (Research Samples) | Mechanical Effect |
| Supplemental Vitamins | 15 | 5,000 | Boosts the odds of inheriting a parent’s best stats |
| Sunlight Therapy | 20 | 5,000 | Increases the total inheritance cap to 65% |
| Quality Nest Materials | 30 | 7,500 | Further increases the chance of pulling peak attributes |
| Advanced Parental Care | 35 | 7,500 | Pushes the absolute inheritance cap to 80% |
| Enhanced Baby Formula | 40 | 10,000 | Maximizes the probability of pulling the best stats |
| Spliced Breeding | 45 | 10,000 | Allows previously spliced creatures to breed |
| Void Resonance Treatment | 50 | 10,000 | Unlocks the ultimate 100% stat inheritance cap |
The Golden Rule: Breed Before You Splice
I cannot stress this enough: always finish your breeding loop before you approach the Splicing Station. Splicing a Voidling permanently sterilizes it, locking it out of the Pheromone Nest forever.
At 5 Polychrome Mutagens a pop, splicing is brutally expensive. Do not treat it as a casual experiment. You need to read up on our Voidling Bound Guide: Evolution, Breeding, and Splicing Blueprint to guarantee you are not blowing premium currency on a dead-end build.
Follow this exact sequence to avoid disaster:
- Capture or hatch a bunch of Voidlings from the same species and compare their Natures.
- Pair the strongest two in the Pheromone Nest.
- Run a mission, hatch the egg, and immediately compare the baby’s stats to the parents.
- Replace the weaker parent with the superior child and repeat the cycle.
- Once you hit max stats and secure your desired Dual Nature, then—and only then—spend your mutagens to splice the final candidate.
How to Hatch Rare Mutant Variants
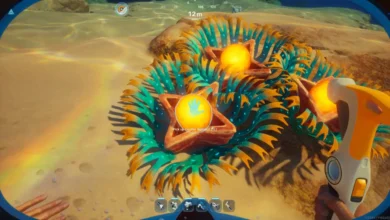
Mutant variants are entirely separate from standard genetic rolling. These physical anomalies require active environmental exposure and combat experience during incubation. If you leave your egg in the Safe Hub, the mutation chance is locked at a miserable 0.1%.
To force a mutation, you need to equip the Portable Incubator Backpack. During the final 20% of the egg’s hatching timer, you must dive into high-danger sectors. Sustaining an environmental hazard level above 80 rads for an hour of active gameplay spikes the mutation chance up to 15%.
The exact variant you get depends on three factors during that final stretch: the specific biome hazard, the elemental Echo-EXP generated by your active weapons, and any Catalyst Items stuffed into your backpack.
| Mutant Variant | Required Target Biome | Necessary Echo-EXP | Backpack Catalyst Item |
| Toxic Artillery | Sector 4: Toxic Wastes | Continuous Corrosive damage | Corrupted Isotope-9 |
| Plasma Bruiser | Sector 7: Plasma Storms | Sustained Thermal or Plasma | Neural Matrix Stabilizer |
| Cryo Striker | Xylos-9: Glacial Ruins | Cryogenic Area-of-Effect | Sub-Zero Gene Splicer |
| Void/Kinetic Support | Anomalous Core | Void-infused Kinetic | Alpha-Tier Bio-Core |
The Incubation Stall Strategy
Nobody wants to grind a toxic wasteland for two straight hours just to pop an egg. Instead, use the stall strategy. Leave the egg safely on your ship until it hits exactly 80% readiness. Once it crosses that threshold, strap on the backpack and drop into the target biome for a quick firefight. This guarantees you meet the environmental requirement without wasting your whole night.
Alternative Routes: Anomalous Nests and Weapon Sacrifices
If you hate the radiation grind, the game offers two extreme alternatives.
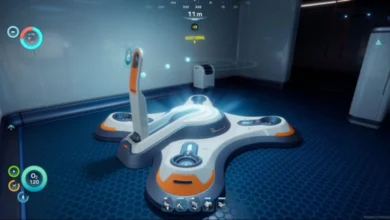
First, you can hunt down Anomalous Nests hidden inside endgame Corrupted Biomes on Xylos-9. These mini-dungeons are guarded by brutal Elite Alpha Voidlings. If you can survive the raid and crack the chest, you get an egg with a guaranteed 50% base mutation rate that completely bypasses the standard backpack incubation.
Second, if your Breeding Pod is upgraded to Level 4, you unlock the Matter Ingestion port. This system lets you feed high-tier weapon scrap directly to the egg during conception. Dismantling a fully leveled Legendary Plasma Sniper into an Artillery session forces the birth of a Cybernetic Mutant Variant equipped with metallic armor and plasma projectiles matching the gun you just sacrificed. It entirely removes the RNG element, but it will cost you your favorite firearms.
Pro Tips for Efficient Breeding
- Pick a single species and focus entirely on it. Trying to juggle four different bloodlines at once is a logistical nightmare.
- Keep every single duplicate you find until you verify its Nature. One random catch could hold the exact trait you need to finish a Dual Nature build.
- Mutants cannot breed. They are entirely sterile. Always run your bloodline program using standard Voidlings, and only mutate the final, perfect egg.
- Your co-op partner matters! Any elemental Echo-EXP fired off by a friend within 50 meters gets soaked up by your backpack, meaning you can easily force dual-element mutations with a little teamwork.