Pokémon Champions Guide: The Definitive Doubles Meta Tier List
Stop dropping ranking points with Singles-focused rosters. Discover the absolute best S-Tier anchors, niche supports, and weather controllers to dominate the Regulation M-B Doubles format.
Quick Answer: Winning in the Doubles format requires deep synergy and board control rather than just slamming your hardest hitters onto the field. To climb the competitive ladder efficiently, build your core around S Tier heavyweights like Incineroar and Kingambit while using niche supports to dictate the pace of the match.
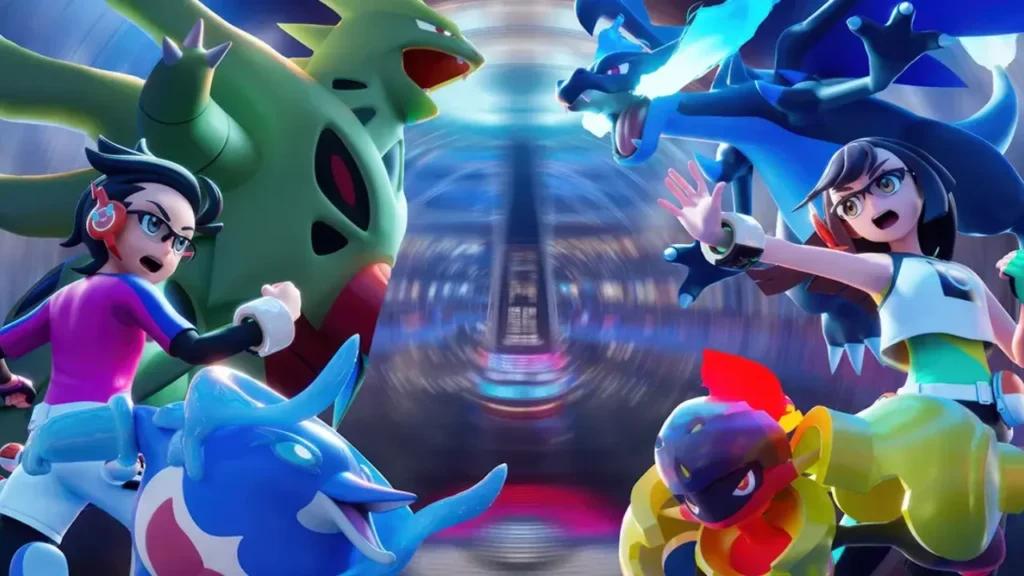
Bringing a team built for 1v1 fights into the Doubles queue is a guaranteed way to lose your ranking points. The competitive landscape heavily rewards players who understand board positioning, weather manipulation, and attack redirection.
With Regulation M-B shaking up the meta, I spent the week grinding through the top brackets to see what actually works. A monster that sweeps entire teams in Singles can easily become dead weight when forced to fight two targets at once. Stop wasting your time experimenting with awful combinations. Here is exactly who you need on your roster to dominate the current format.
The Complete Doubles Tier List
Before we dive into the specific mechanics of the top threats, you need a broad view of the current meta. Keep this breakdown handy when you are crafting your next squad in the team builder.
| Rank | Pokémon |
| S Tier | Incineroar, Kingambit, Garchomp, Eternal Flower Floette |
| A Tier | Sneasler, Glimmora, Tyranitar, Charizard, Sinistcha, Wash Rotom, Hawlucha, Aerodactyl |
| B Tier | Pelipper, Whimsicott, Archaludon, Maushold, Gengar, Torkoal, Excadrill, Froslass, Dragonite, Farigiraf, Scizor, Basculegion (M), Hisuian Arcanine |
| C Tier | Delphox, Hatterene, Primarina, Feraligatr, Meowscarada, Toxapex, Armarouge, Oranguru, Blastoise |
S Tier: The Unstoppable Anchors
These four monsters define the current competitive rulebook. If you refuse to use them, you must have a highly specialized plan to counter them.
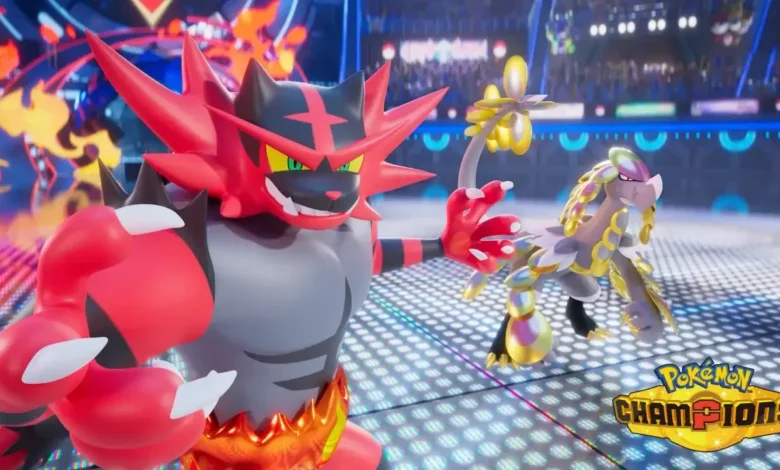
Incineroar
I am fully convinced this wrestling cat will never die. It dominated past formats and brings that exact same suffocating utility to Pokémon Champions. Its Intimidate ability is the main reason it sits at the top of the ladder, instantly crippling the physical damage of both opposing monsters the second it touches the field.
Its Fire and Dark typing grants six resistances and a total immunity to Psychic attacks, making it absurdly hard to remove. I typically drop a Snarl to ruin the enemy team’s special attackers, then pivot out using Parting Shot to tank their stats even further. It doesn’t dish out massive damage, but that is not its job. Just watch out for opponents leading with Defiant users, as your Intimidate drop will hand them a massive attack boost instead.
Kingambit
This absolute tank is my favorite tool for punishing enemy Intimidate spammers thanks to its Defiant ability. Alternatively, you can run Supreme Overlord to turn it into a terrifying late-game cleaner. Its signature attack, Kowtow Cleave, literally cannot miss. Removing accuracy RNG from high-stakes matches is an incredible relief.
Kingambit boasts nine distinct resistances due to its Steel and Dark typing. Sucker Punch gives it a lethal priority move to compensate for its awful base speed. You absolutely must protect it from Fighting moves, however, as a four-times weakness means a stray punch will instantly delete it from the board.
Garchomp
Garchomp is perfectly fine in Singles, but it becomes a genuine nightmare in Doubles. Access to brutal area-of-effect attacks allows it to pressure both enemy slots simultaneously. I love pairing it with the Rough Skin ability to punish physical attackers, dealing free chip damage whenever they make contact. Keep it far away from Ice moves and it will shred the opposition.
Eternal Flower Floette
The total absence of the Assault Vest item in the current regulation has turned Eternal Flower Floette into a special attacking juggernaut. Fairy Aura amplifies the damage of all Fairy attacks on the field, turning its basic moves into nuclear warheads. It easily scares away major physical threats like Garchomp. The catch is that it demands your single Mega Evolution slot, and its physical defense is incredibly frail against decent Steel attackers.
Getting stomped by these high-tier meta teams over and over can easily burn you out. If you need to clear your head with a completely different kind of challenge, take a break with our comprehensive Hollowbody puzzle and survival walkthrough.
A Tier: The Meta Staples
These picks form the essential backbone of most successful teams. They hit hard and provide immense utility, but they carry obvious weaknesses your opponent will try to exploit.
Sneasler
Speed is everything, and Sneasler is one of the fastest non-Mega threats available. Dire Claw is the main reason I keep it around. The attack applies totally random status effects, meaning you can instantly sleep, paralyze, or poison a target and completely derail their strategy on turn one. Pair it with a consumable item to trigger Unburden for even more speed, but switch it out immediately if a Psychic attacker hits the field.
Glimmora
This is my favorite hybrid for setting up hazards while maintaining offensive pressure. The Toxic Debris ability automatically litters the enemy side with Toxic Spikes whenever Glimmora takes a physical hit. Slap a Mega Evolution on it to trigger Adaptability, turning Meteor Beam into a devastating nuke. Just be aware of its massive Ground weakness and its vulnerability to Taunt.
Tyranitar and Charizard
Tyranitar remains the undisputed king of sandstorm control. Sand Stream chips away at enemies while granting Tyranitar a massive Special Defense boost. It is incredibly slow, so play carefully around Fighting types.
Charizard offers incredible flexibility because both of its Mega forms are completely viable. You can build it as a physical brawler or a special attacker under the sun. Just remember that it requires that Mega slot to be useful, and Stealth Rock will strip away half its health upon entry.
Sinistcha
Sinistcha is a masterclass in board support. The Hospitality ability instantly heals its partner just by switching into the battle. You can use Matcha Gotcha to keep Sinistcha healthy while fishing for burns, and Rage Powder provides top-tier redirection to protect your frail attackers.
B and C Tier: The Niche Specialists
The monsters sitting in the lower tiers are not inherently useless. They just require you to build your entire strategy around their highly specific toolkits.
Weather Control
Pelipper and Torkoal live in the B tier strictly because they control the weather.
- Pelipper sets the rain with Drizzle, creating the perfect environment for Archaludon to fire off immediate Electro Shots without a charging turn.
- Torkoal drops the sun with Drought and spams maximum-power Eruptions.
These strategies are incredibly predictable and will instantly collapse if the enemy brings a Tyranitar to overwrite your weather conditions.
Speed Control and Redirection
Frail attackers cannot survive without proper board control. These are the best tools for the job:
- Whimsicott: Uses Prankster to set up priority Tailwind and Encore, dictating the speed of the match.
- Farigiraf: A phenomenal Trick Room setter. Its Armor Tail ability completely blocks enemy priority moves like Fake Out.
- Maushold: Leverages Friend Guard to passively reduce the damage its partner takes, while using Follow Me to draw incoming attacks away from your main threat.
Keep in mind that a single well-timed Taunt from a faster opponent will shut down these support strategies entirely, leaving you with dead weight on the board.