Directive 8020 Guide: Every Simms’ Recording Location
Track down all 10 hidden audio logs and piece together the dark secrets of the Cassiopeia crew.

Quick Answer: There are 10 total Simms’ Recordings scattered throughout Directive 8020. You need every single one to hit 100% completion and grab that Platinum trophy, but do not worry about missing any. You can easily revisit chapters at any time to clean up your missing collectibles.
Uncovering the Crew’s Secrets
Supermassive Games loves hiding critical backstory elements in plain sight. Track down all the Simms’ Recordings in Directive 8020 and you will peel back a thick layer of lore detailing exactly what went down with the crew before the primary mission fell apart.
Hunting down audio logs can feel tedious when you are actively trying to survive a horror game. Thankfully, the developers threw us a bone here. The chapter select feature lets you jump right back into any episode. You are totally free to prioritize the main story first and tackle your collectible cleanup later without fear of getting locked out.
Before we dive into the exact hiding spots, here is a quick cheat sheet tracking which episodes hold these crucial tapes.

| Recording Name | Episode Found In | Specific Area |
| Green Tea | Episode 1 | Crew Quarters |
| Patches | Episode 1 | Medical |
| Red Alert | Episode 2 | Ship Snare |
| Sweet Dreams | Episode 2 | Sleuth |
| Slingshot | Episode 3 | Gear Up |
| Special Permission | Episode 3 | Search |
| Hostile Fire | Episode 5 | Radio Silence |
| Field Agent | Episode 6 | Detour |
| Rabbit Hole | Episode 8 | Redirect |
| At Peace | Episode 8 | The Way Back |
If you are aiming to grab every single collectible in a single run, you will want to knock out the other hidden items alongside these audio logs. Do yourself a massive favor and read our related guide on all Curator Secrets locations in Directive 8020.
Where to Find Every Simms’ Recording
Ready to grab them all? Let’s break down the exact path to each recording.
Episode 1: Crew Quarters & Medical
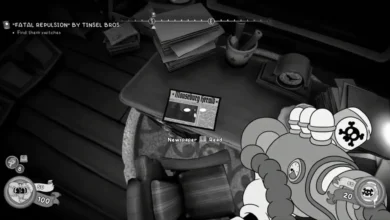
- Green Tea: The very second the game hands you control of your character in the Crew Quarters, turn toward the room situated on your right. Step inside and inspect the wall to grab your first collectible.
- Patches: Over in the Medical bay, you will eventually receive an objective pointing you toward a breach location. Ignore that marker for a second. Walk up the nearby stairs instead to secure the second tape.
Episode 2: Ship Snare & Sleuth
- Red Alert: While pushing through the Ship Snare chapter, keep an eye out for Eisele. Walk right past them and take the staircase on your right-hand side. The log is resting right up there.
- Sweet Dreams: During the Sleuth section, simply pop into the Locker Room. It is sitting right out in the open.
Episode 3: Gear Up & Search
- Slingshot: In the Gear Up segment, look for the cluster of Tool Sheds on the left side of the room. Peek inside to snatch this one.
- Special Permission: While exploring the Mess Hall during the Search episode, walk down the main steps. Take an immediate left to spot the recording.
Episode 5: Radio Silence
- Hostile Fire: Finding the airlock is your main cue here. Once you spot it, hang a left. You need to restore power to the nearby storage room. Flip the juice back on, walk inside the storage area, and claim your prize.
Episode 6: Detour
- Field Agent: You will be controlling Stafford for this segment. Make your way to the Executive Office and pull the door open. Check the corner of the room to log this audio file.
Episode 8: Redirect & The Way Back
- Rabbit Hole: This one requires a little stealth. While you are actively sneaking around the hostile life form in Redirect, you have to divert power over to the Deck 2 Locker Room. Once the power is rerouted, sneak inside the room to grab the log.
- At Peace: The final recording is buried behind a mini-puzzle during The Way Back. Pull the power cell out and slot it into the vents right behind you. Crouch through the newly opened shaft. Once on the other side, lift the lockdown to restore juice to the door. Lift the next lockdown, reroute the power straight to the Server Control Panel, and force the path open so you can squeeze on through. Stay crouched as you navigate the passage, reroute the power one last time, and lift up the cabinets to reveal the final Simms’ collectible.